Note: During the time that you are modifying, you should be use development server that help you create a local server and you can see it directly. To use it, first you need to install Node.js, then open terminal / command prompt and type: "npm run serve" to start development server:

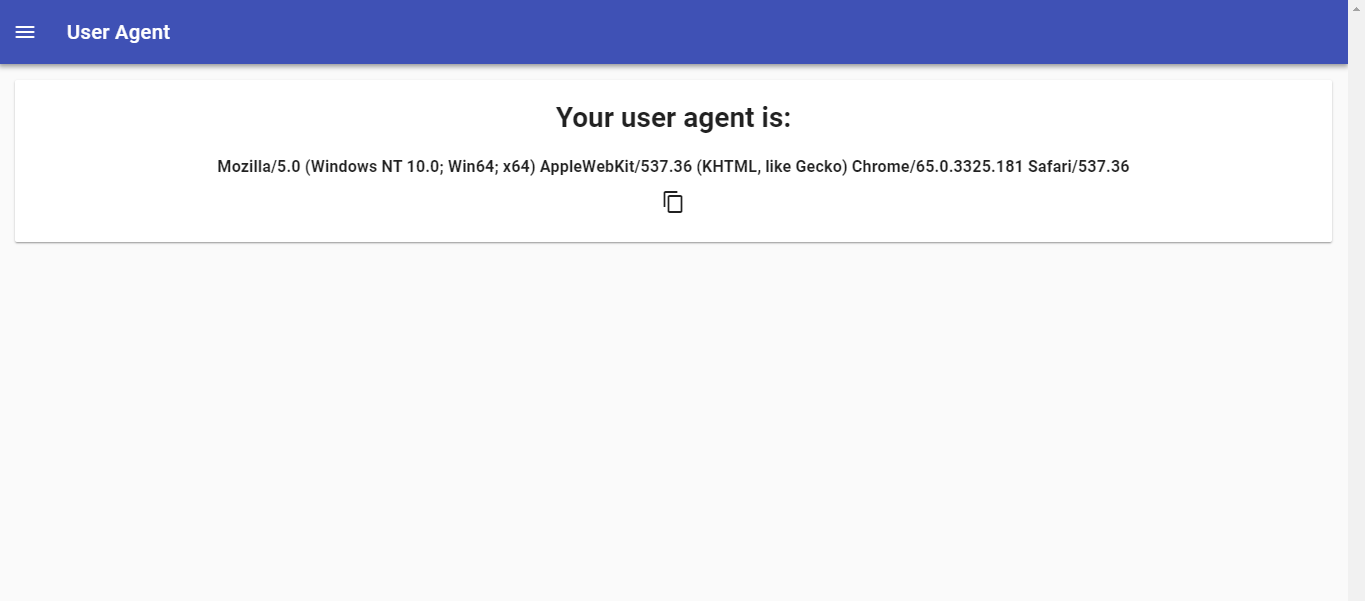
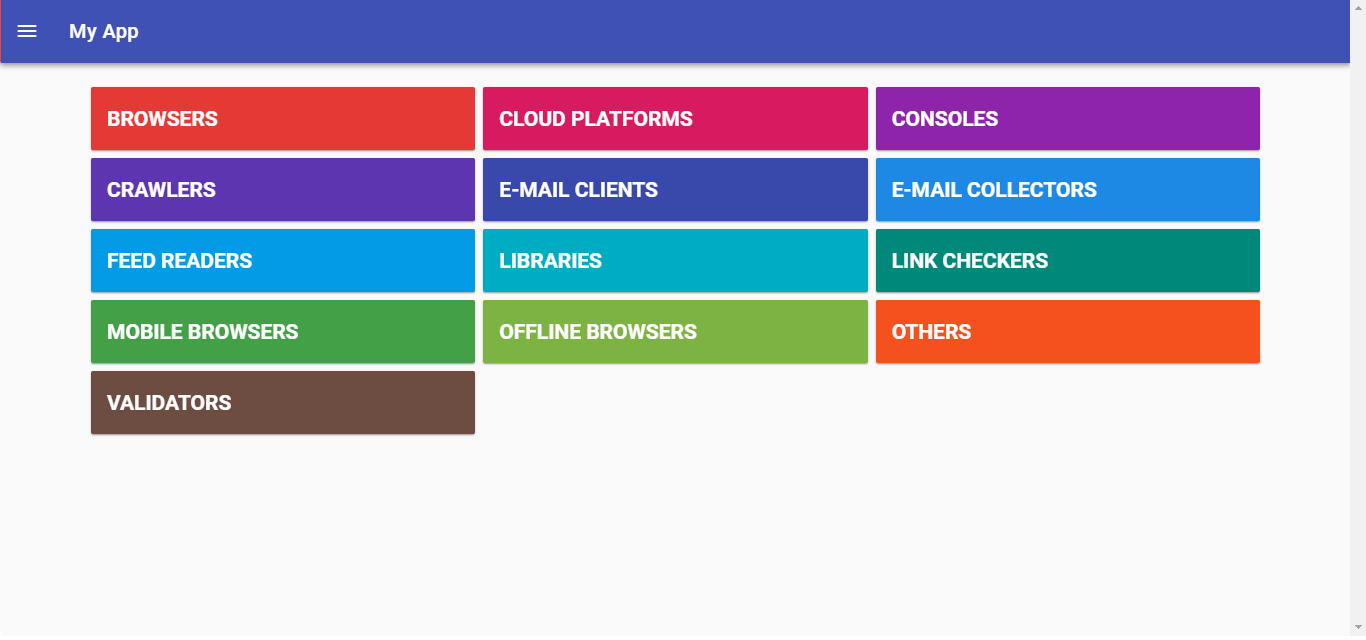
Open link "http://localhost:8080/#/":

Layout
1. Title
Open "src/App.vue" and you will see:
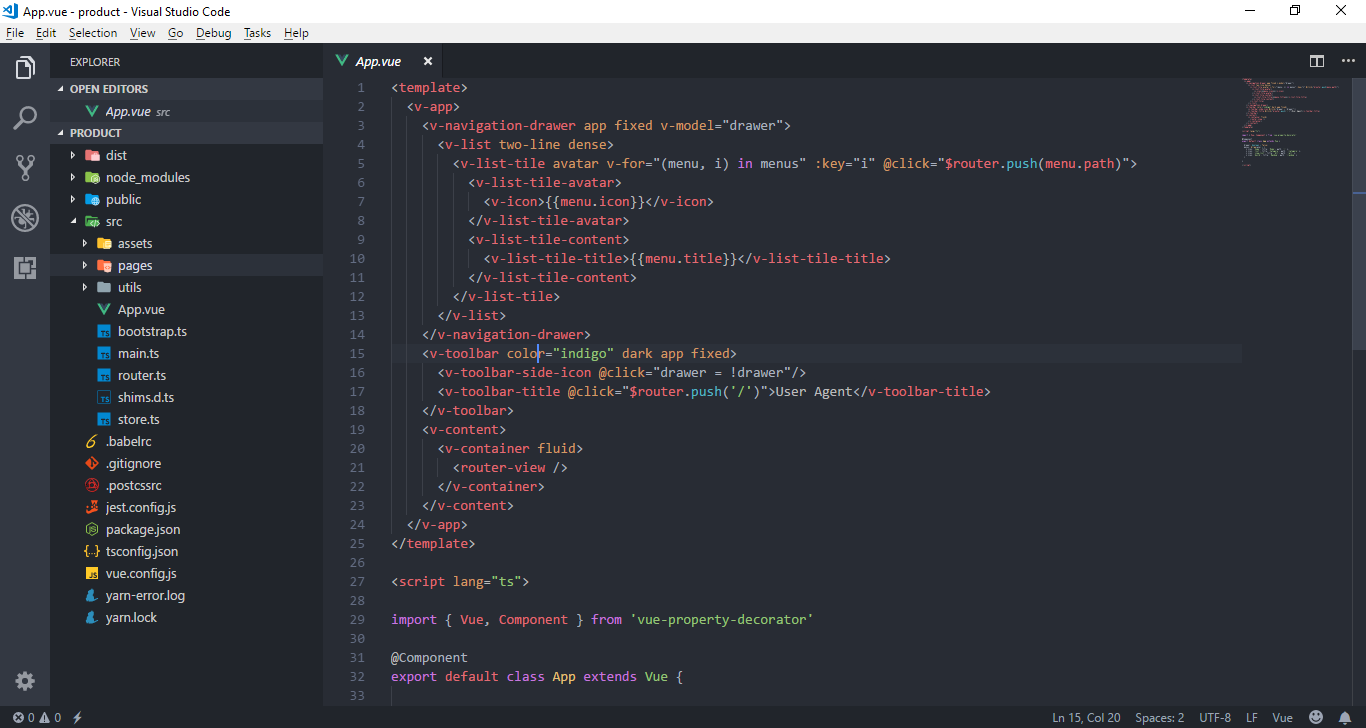
Take a look at <v-toolbar-title> element, if you change text inside, the title will change.

Example: 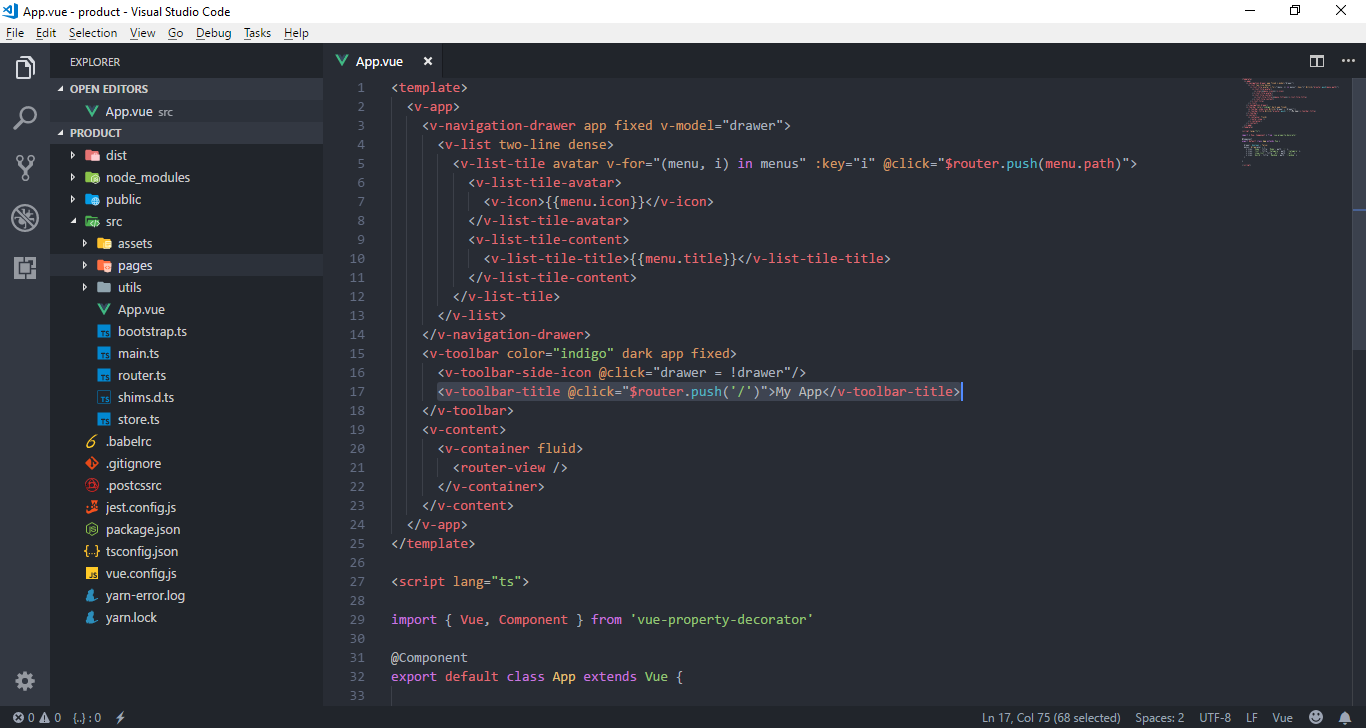
Result:

2. Toolbar's color
Take a look at the color attribute in <v-toolbar> element, if you change text inside, the color of toolbar will change.
Note: Find color here: Vuetify

Example:

Result:
3. Drawer
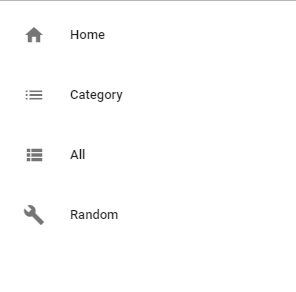
Scroll down and you will see:
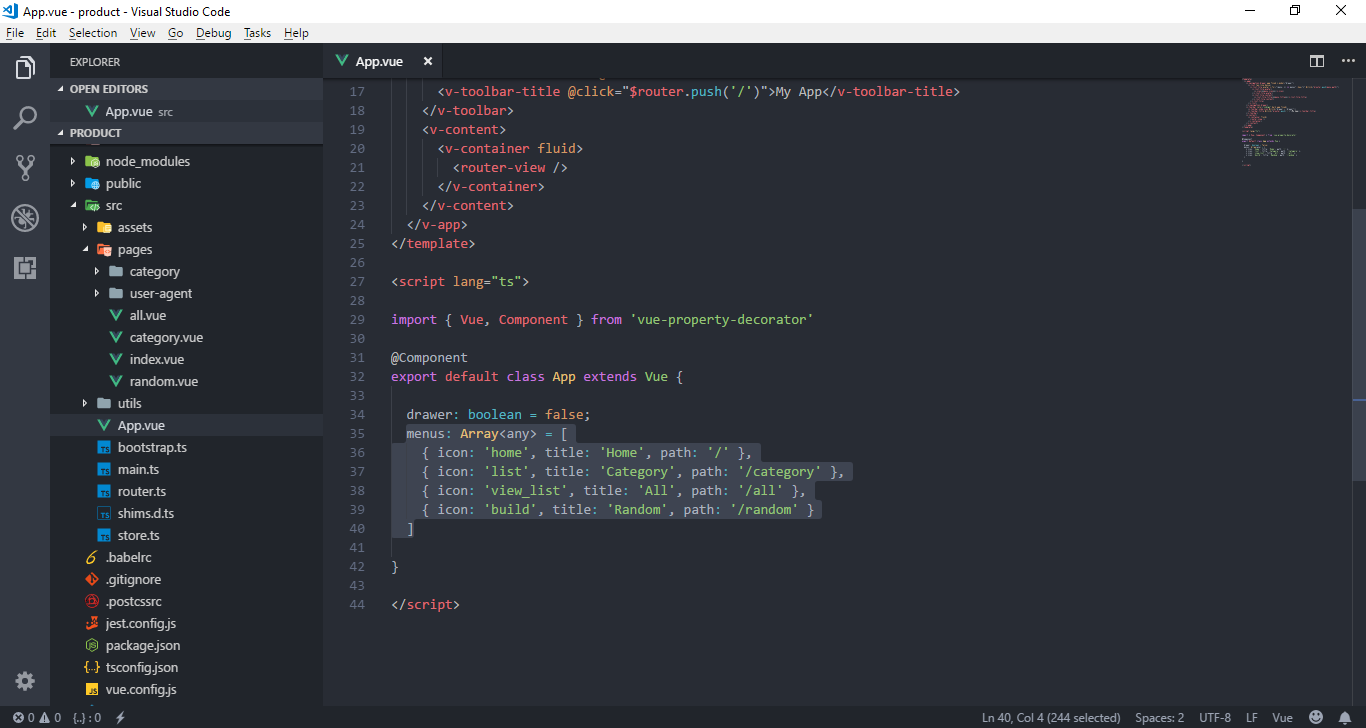
Look at the its properties, you probably understand what it means. You can freely change the "icon" and "title" property, but be careful with the "path" property.
Find icon here: Material Icon
Category page
 Open file "category.vue" in folder "src/pages":

Just change each element in "colors" array to the color that you want.
Custom page
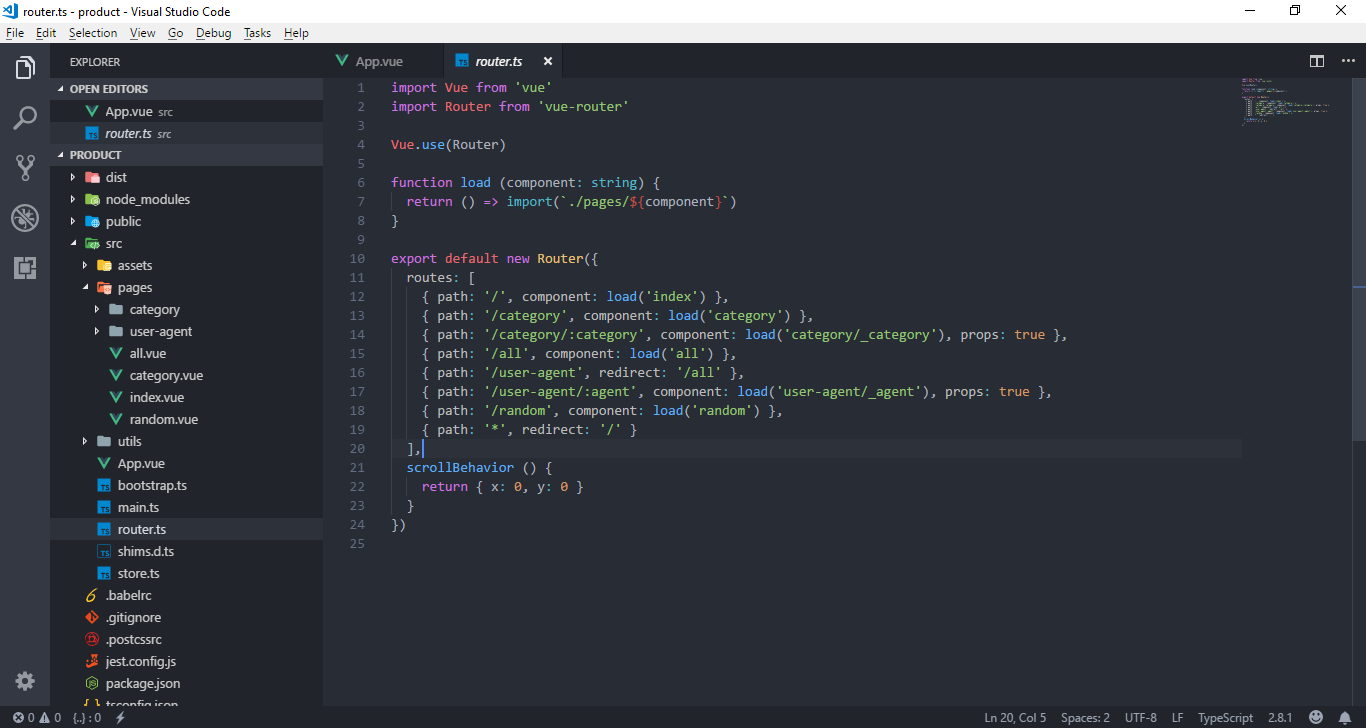
All of the instruction above are special things. All pages of this app located in folder "src/pages", to find out which component corresponds to which router, open file "routes.ts" in "src":
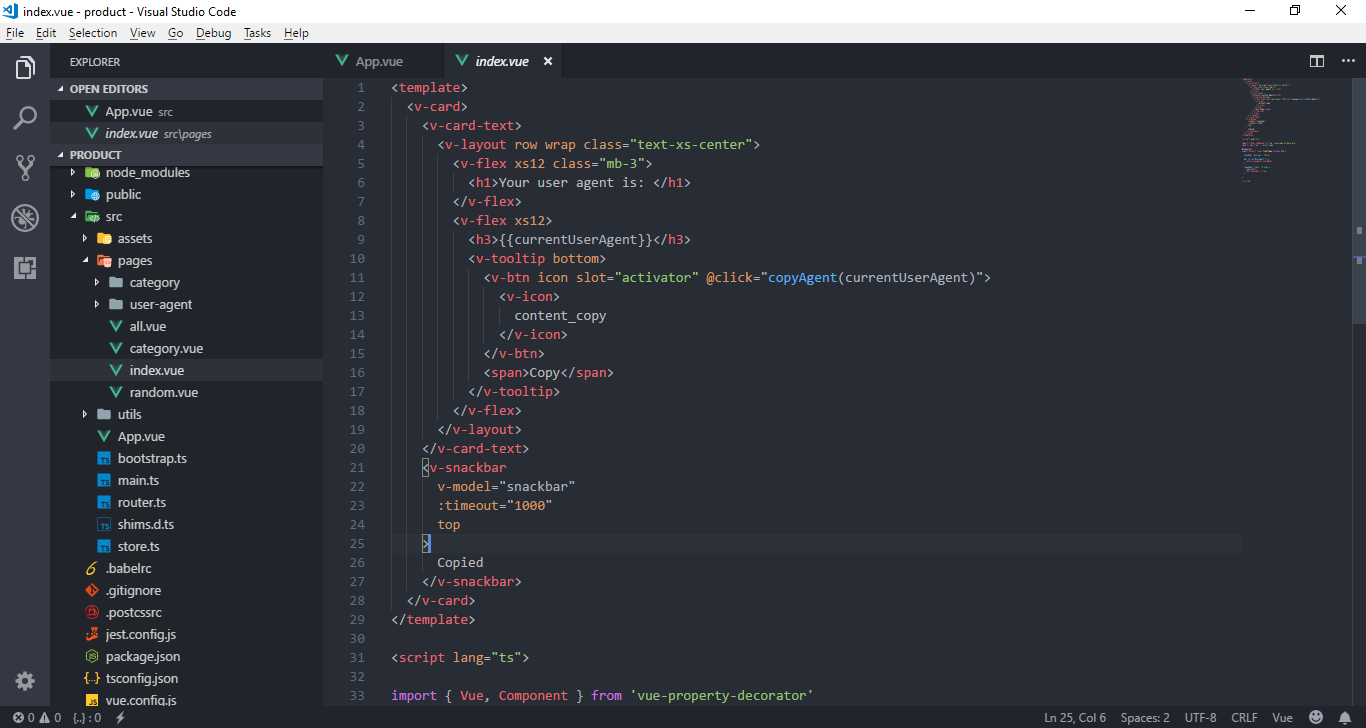
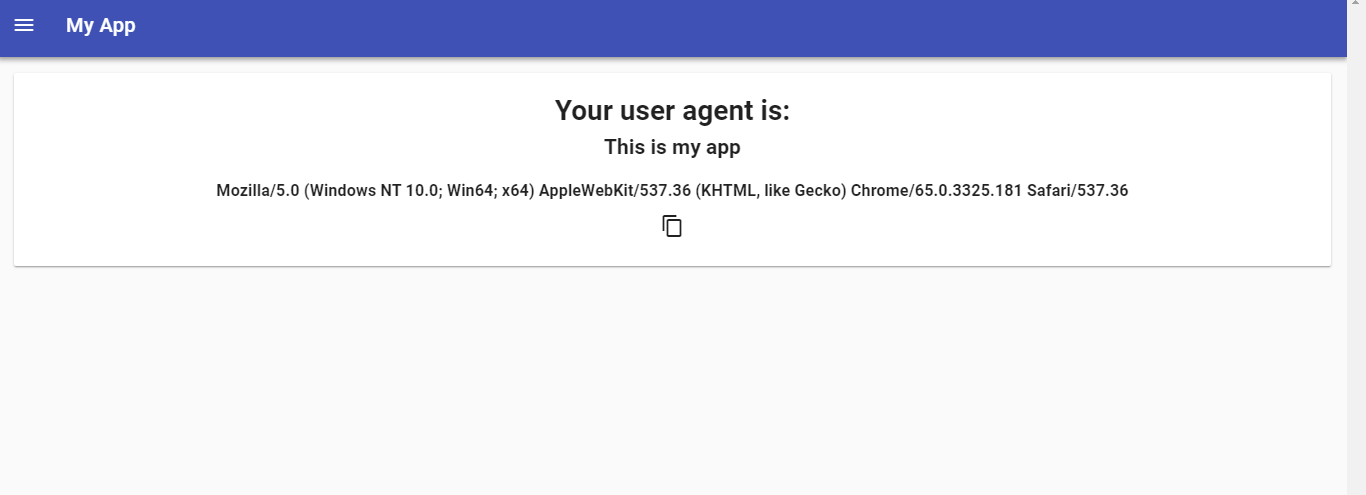
You can add any element such as <p>, <h1>, <h2>,.... Example, in file "index.vue" that it match route "/":
I'm going add a <h2> element:
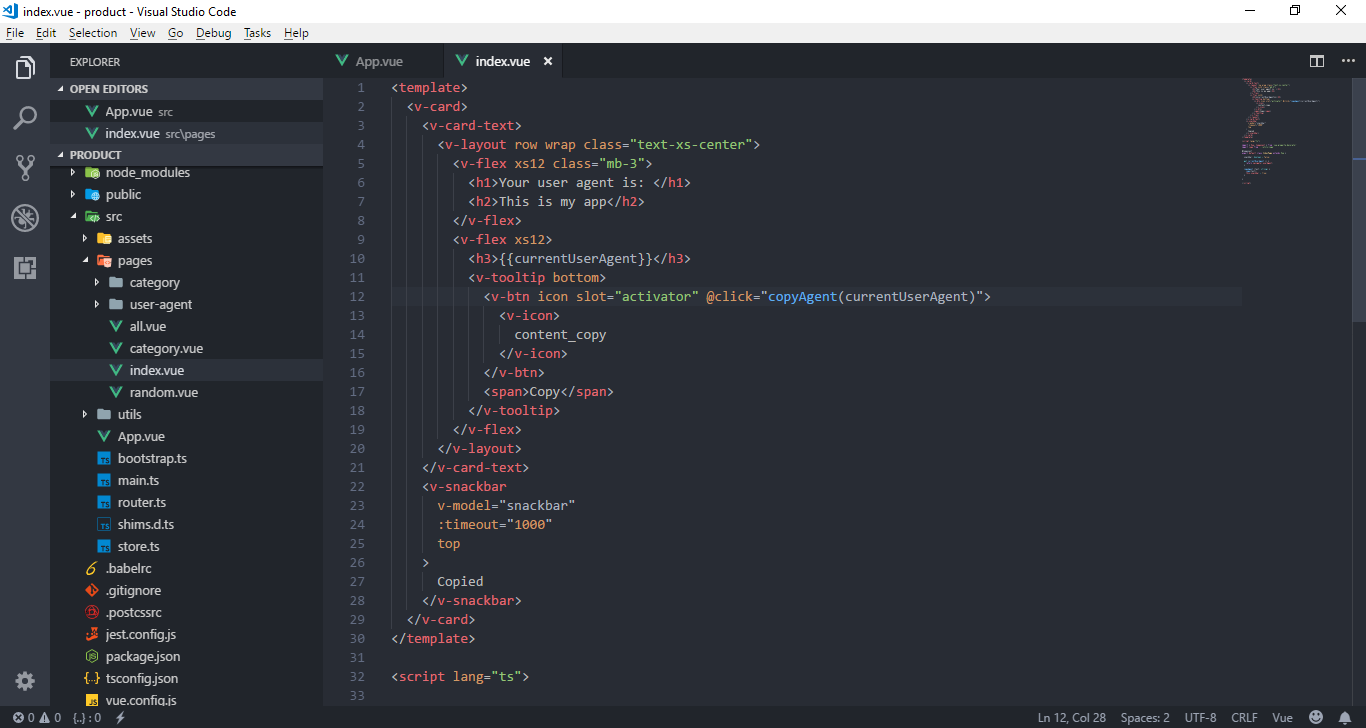
Result:
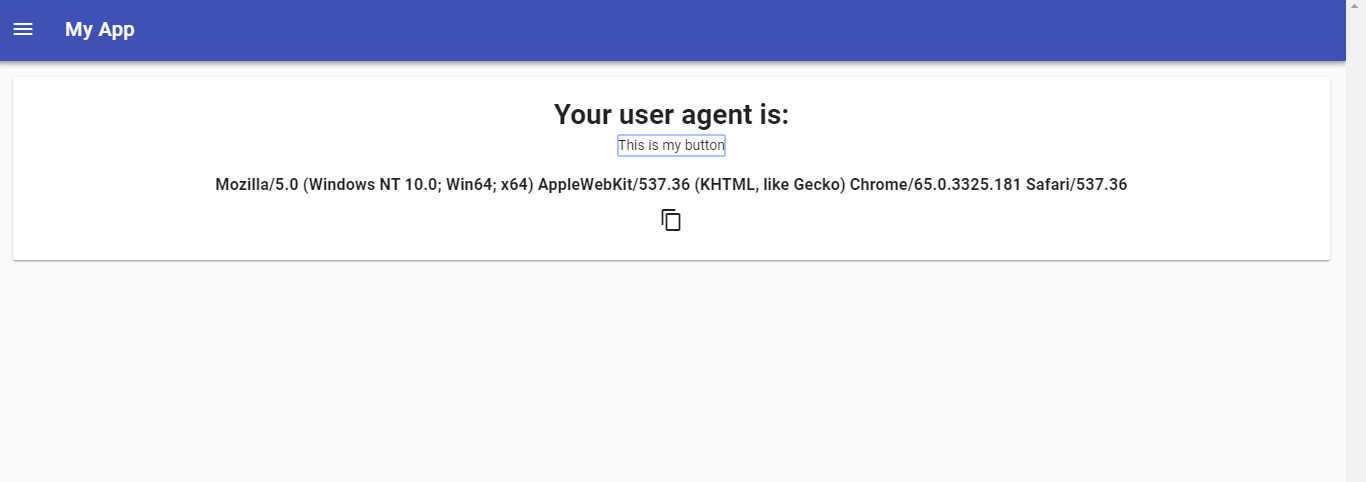
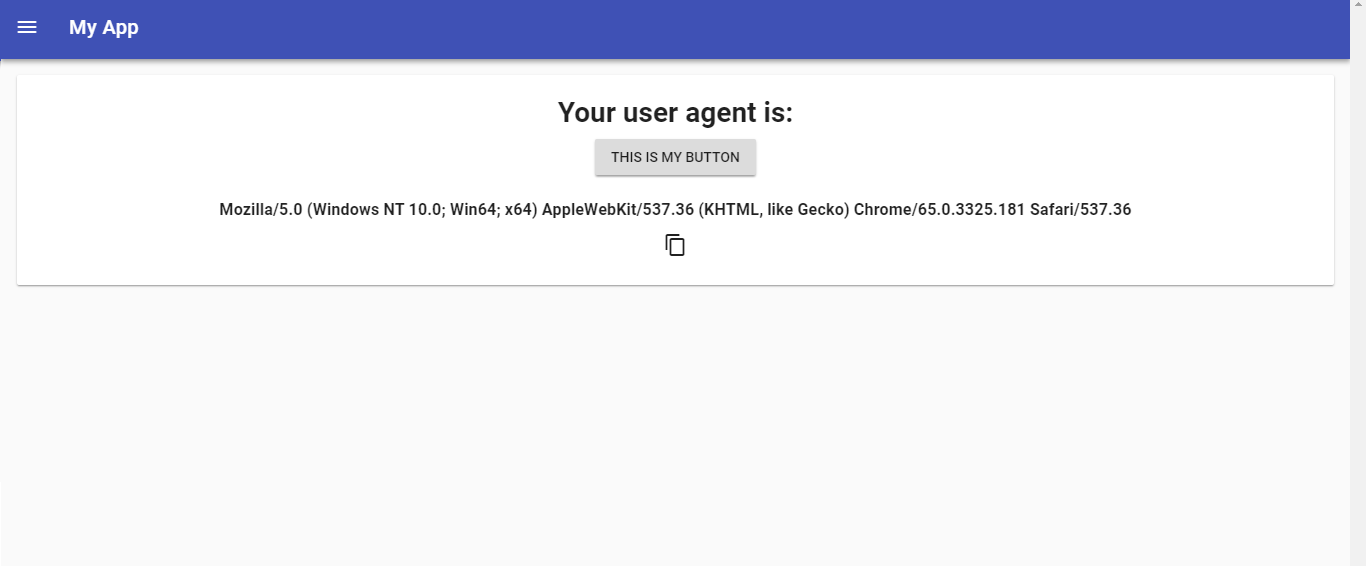
It is similar to other components, but if you want to add some element like button, you won't want to use <button> element, example:

Result:
This is the time that you need to use Vuetify - a material design component framework that include a large number of components such as button, input, select,...
Example, i will use <v-btn> instead of <button>:
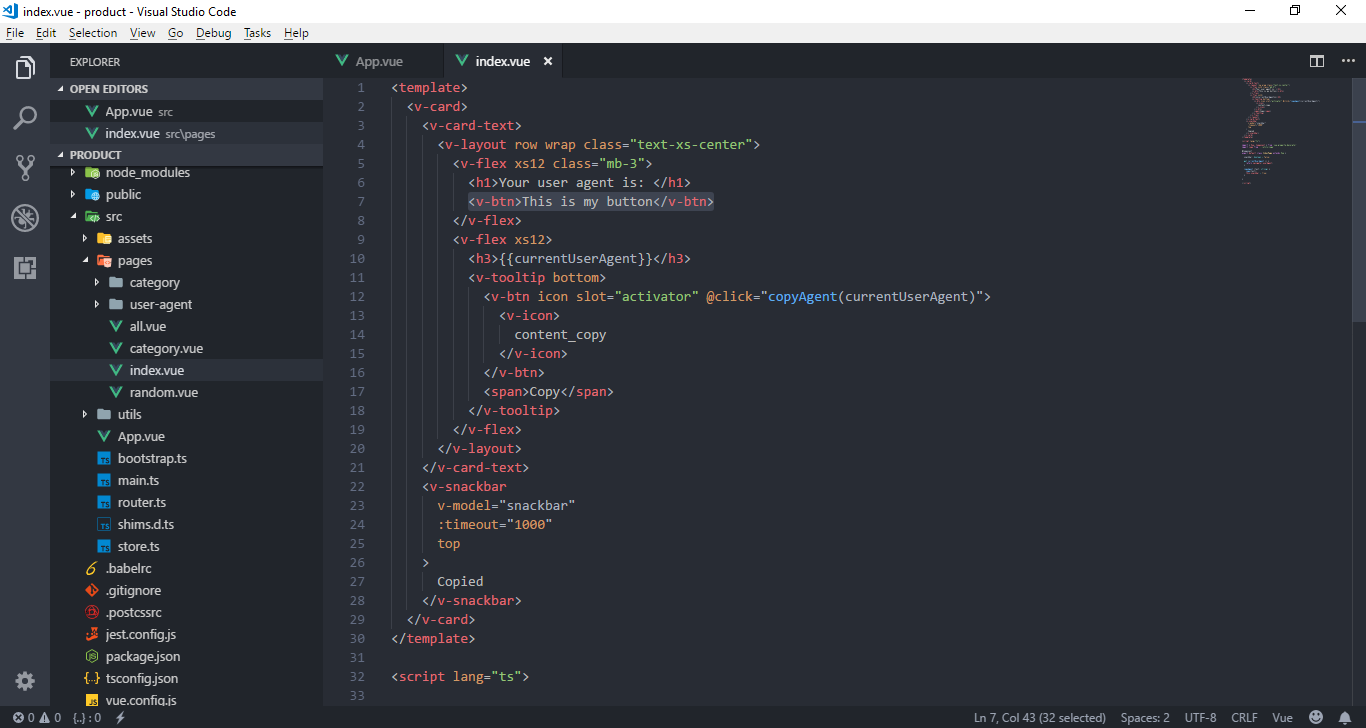
Result:
So, if you want to go deeper, you will probably want to learn about its available components.